Skip down to page content.

Real Estate Information Archive

Blog

Displaying blog entries 1-10 of 12

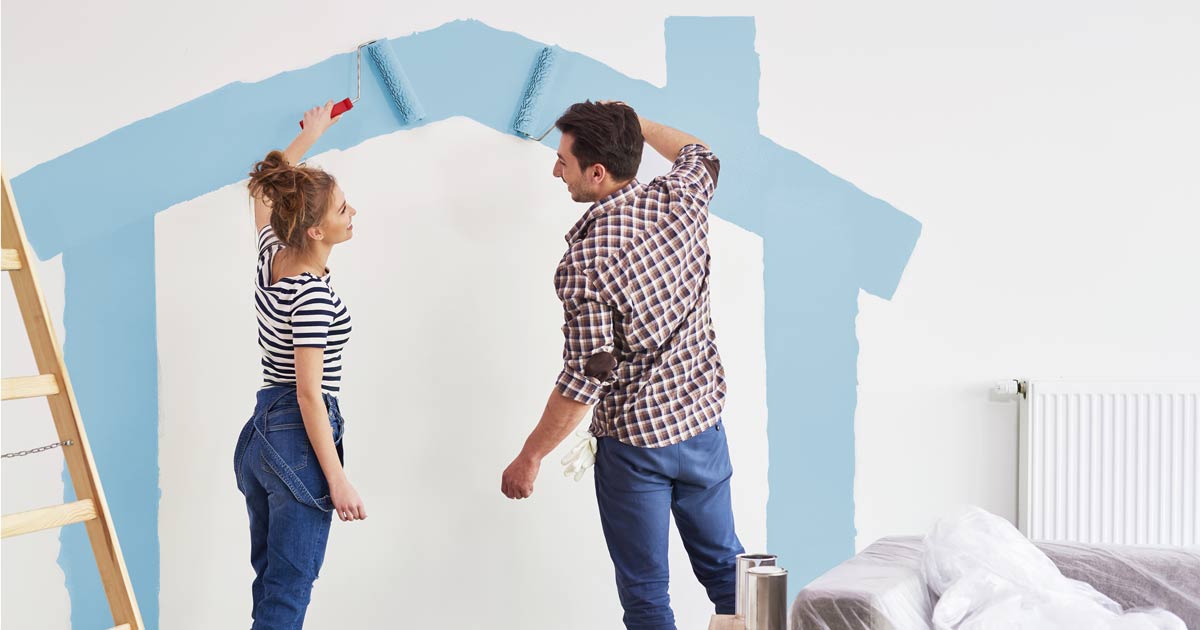
Finding and Fixing Possible Dangers at Home

by Tucker Robbins

Your home should be your haven.  Sometimes, though, things can happen, and it may not be quite as safe as you’d like.  Let’s look at some possible dangers in your home and find out how to fix them. 


  • - Unfortunately, fire is a very real danger.  Every day things like burning candles, cooking, and using appliances can cause fires.  One of the main appliances that starts fires is the dryer.  Keep your lint screen collector clean, even washing it in warm water and mild detergent every month, and use a lint collecting brush to clean down into the lint trap vent.  Once a year, unplug the dryer, remove the back and carefully vacuum any lint that has settled in the back around the motor and wiring. Smoke alarms and fire extinguishers are imperative to have. 
     

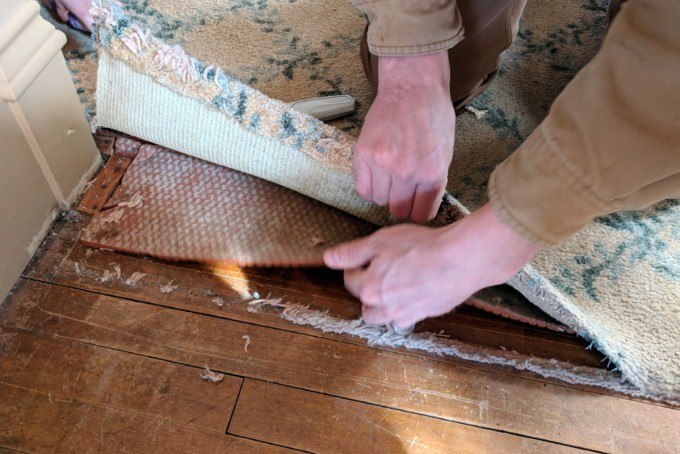
  • - Check and maintain areas of your home that are possible fall risks.  Make certain handrails are secure, steps are free of debris, and that brick or concrete steps aren’t crumbling, and wooden steps are sturdy and free of rot.  Secure area rugs with non-skid tape and keep bathroom floors dry by using easily washed bath mats outside the tub when bathing. 
     

  • - Older homes can have lead paint under layers of newer paint.  If you plan on removing paint from woodwork, and your home was built before 1978, purchase a lead-testing kit at your local home center or hardware store. In the case of a positive test, find a specialist that will remove the lead paint safely.  Find more information at epa.gov/lead or call 800-424-LEAD. 
     

  • - Speaking of older homes, have an inspector look at the plumbing for lead or polybutylene (PB) pipes.  Lead is obviously not safe to use for drinking water, and polybutylene pipes can rupture. 
     

  • - While not all molds are extremely dangerous, many people suffer from allergies to molds.  Most feared is black mold, though there are different types of black mold.  As soon as you see mold anywhere, clean it up using non-ammonia cleaner and water, or bleach on hard surfaces like your bathroom.  If the mold continues to grow, it would be best to call a pro who can look for the cause and make repairs. 
     

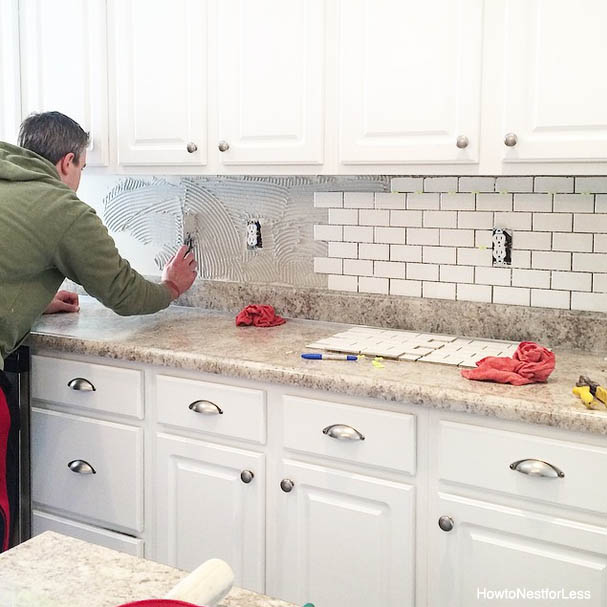
  • - Asbestos is only a dangerous substance if it’s disturbed.  If you notice deterioration in an area that you know is made of asbestos, or you’re getting ready to remodel, seek a local professional that can safely remove the offending material. 


This isn’t a financial subject, but it’s best to have an emergency savings for things like this that can come up, and you won’t have to worry so much about paying for the repairs when it comes to that.  Correcting problems as soon as you find them is best for you and your family’s health and well-being.  Home safe home is a home sweet home.


Courtesy of New Castle County DE Realtors Tucker Robbins and Carol Arnott Robbins.   


Photo credit: mentalfloss.com

Quick Home Improvements

by Tucker Robbins

home improvements


Home improvements can many times take a lot of time and can easily overwhelm you.  The home improvements listed in list article are some that won’t take you a lot of time.  Likely you will be able to get these home improvements done in just a matter of a day or so.   Whether you want to do these home improvements for your own enjoyment or you plan to sell your house, these will get you started in the right direction and won’t take up a lot of your time.   


  1. First on the list of quick home improvements is to simply change your front door hardware.  This is a simple and easy fix that won’t take you long at all and it is one that won’t cost you a lot either.   

  1. Painting the front door a bright color is another quick home improvement that can really make a big difference in the way your house looks.  Red is a popular color that can make a statement to those who pass by your home.  Another great color to use on your front door is a bright teal color.  Both of these colors are very popular these days so if you want to be part of what is in, you should use one of these colors.   

  1. Another quick home improvement that can make a huge impact on how your home looks is to upgrade your house numbers.  You can buy fancy glass or ceramic tiles with your house number on them to match your newly painted door.   

  1. Painting outdated or old furniture in your home is another quick home improvement that can make your house look awesome.   

  1. Updating your kitchen and bathroom fixtures is a quick home improvement that is easy to do and will make your house look the best it can look.   

  1. If you have an old fireplace that is no longer able to be used, why not put some candles in it to spruce it up a bit.  This is a nice cozy improvement to make especially during the upcoming colder months.   


Again, home improvements don’t have to take a ton of time to make a huge difference on how your house looks.   


Courtesy of New Castle County DE Realtors Tucker Robbins and Carol Arnott Robbins.   

No Paint Crew Necessary!

by Tucker Robbins


The walls of your home are begging for a new paint job, or you simply want to change your decor colors, but money is not flowing freely enough to hire a painter.  Painting is one DIY project that is cost-effective and easy enough to make it look as if you 
hired a crew to do the work.  Go over these tips before you get started: 


  • Flat or matte paint is great for hiding flaws, and best used in low-traffic rooms, as it is not as easy to clean as glossy paint.  Use latex paint for high-traffic walls, and oil paint for wood trim.  Leave windows open when painting with oil paint because the odor is quite strong, and it takes longer to dry. 
     

  • When picking colors, do not be afraid to go bold, unless you plan to sell soon, then neutrals are your best choice. 
     

  • Purchase paint samples and apply each color in a 2’x2’ area on the wall you are planning to paint. Once it is dry, you will get a better feel for the color in the different lights, and whether you can live with it or not. 
     

  • The ceiling cannot be forgotten in your new design!  Change the feel of the room’s height by going a shade darker (for a lower ceiling feel) or go a shade lighter or use a lighter color to give the illusion of a higher ceiling. 
     

  • Use this handy paint calculator to determine how much paint you will need.  Other supplies necessary for a professional look are painter’s tape, drop cloths, putty, a putty knife, caulking, and any tools you may need for removing hardware from any doors or walls. 
     

  • Clean your walls and sand if necessary, then use a vacuum to make sure all the dust is gone. 

  • Covering a dark color, stains on the walls, old paneling, or new sheetrock may require a coat of primer prior to painting. Tint the primer with a little of your new wall color before applying. 
     

  • Before you start on the walls, do the little stuff first:  paint in corners and close to the ceiling with a good brush, working your way down to catch drips. 
     

  • Paint the walls in 3’-4’ sections in an overlapping W-pattern, applying paint until you need to reload the roller. When you are near the ceiling and corners, get as close as possible using what is left on the roller where you previously already cut in. This gives a smooth appearance to the finish. 
     

  • Allow the paint to dry for 24 hours and avoid hanging anything on the walls for a few days. Hopefully, you should not have to do any cleaning until the paint has cured, usually two weeks to thirty days. 


Giving your home a facelift with paint is easy and rewarding if done correctly. Feeling adventurous? Try painting a pattern on your wall.  It may take more time, but the dramatic effect it makes in the room makes the wall a focal point, and one you can take pride in since you created it! 


Courtesy of New Castle County DE Realtors Tucker Robbins and Carol Arnott Robbins

Photo credit: Slide-Lok

Small Steps Towards Going Green!

by Tucker Robbins


We know all about using solar energy or doing a net-zero house overhaul in order to help create a greener world.  While they’re great for the environment, they’re not so easy on the wallet. What can we do that can start us on the path of going green and do
 it without needing a loan shark? Look through the following ideas, choose a few, and start making a difference! 


  • - Plant native plants in your landscape! Because they are adapted to your climate, you won’t be watering them as much, and many are naturally pest resistant.  Native landscaping will also encourage wildlife to visit! 
     

  • - Speaking of plants, a “living wall” can cut down on cooling costs in Summer, while helping insulate the colder side of the house in Winter.  Even a wall of ivy can make a difference. Learn more about vertical gardens from FresHome. 
     

  • - Refurbishing or remodeling a room? Add color with low-VOC paints, or use natural wood stains and sealers. Check out local thrift stores or Habitat for Humanity ReStores for pre-owned light fixtures and many other items.  Reclaimed wood can be used for flooring or furniture projects, too.
     

  • - You don’t have to start biking to work in order to cut back on emissions or save money. Keep your vehicle serviced, and make sure you inflate your tires to the correct pressure. Making body modifications on your vehicle, such as removing that rarely used luggage rack, are other ways you can save gas. 
     

  • - In the kitchen, using a large toaster oven instead of your oven can save energy as well as keeping cooler in the Summer months. Slow cookers and pressure cookers are other appliances that conserve.  Other energy-saving cooking tips can be found at energy.gov.
     

  • - According to the WaterHeaterHub website, you can save as much as 25% on the energy used to keep your water hot by installing a timer.  If your conventional water heater is past its prime, switching over to a tankless or solar water heater may be your best option. 


Going eco-friendly doesn’t need to break the bank. Besides those ideas listed above, changing over to LED lightbulbs, making a conscious effort to take shorter showers or composting food waste are all inexpensive baby steps towards your goal.  Start now and see the benefits later! 


Courtesy of New Castle County DE Realtors Tucker Robbins and Carol Arnott Robbins.   


Photo credit: thelincolnian.net

Smart Technology for Your Home

by Tucker Robbins


Not only does it seem like we have new gadgets for communication being released on a daily basis, but smart home technology is advancing by leaps and bounds. Don’t let all of the available devices overwhelm you when you’re shopping around.  Follow this gui
de for tips to help you get started on your smart home journey. 


  • - Smart thermostats are the perfect way to get your feet wet for advanced technology in your home.  They control your heat and air more efficiently by using presence sensors, and can save 10-15% on your power bill. Nest has two versions available, and prices vary $179-$250. Check with your power company to see if they offer a rebate on your new smart thermostat purchase. 
     

  • - Keyless entry isn’t just for your car anymore.  Smart locks are available for your entryways with mobile and desktop apps, so you can control them, and using fingerprint and voice recognition for opening doors.  Prices vary greatly, and the choices are numerous. PCMag has made a list of the best smart locks of 2017 that can help you comparison shop. 
     

  • - Home security systems have been around for eons, and the older brands have someone monitoring your system for you, and you pay a subscription fee.  Today there are DIY security kits that will connect to your home smart system, and will alert your mobile phone app if there is a breach, but it’s your responsibility to contact authorities.  
     

  • - Sometimes a simple security camera can give you peace of mind, and cameras are now available with motion and heat sensors so that they only turn on when you have chosen those sensor settings.  These cameras have WIFI connectability, and you can use your PC or laptop to check the daily camera video. 
     

  • - If you don’t care for a whole-house lighting control system, there are smart light bulbs controllable via Bluetooth, but that means they cannot be controlled from outside the home, or if you’re out of range.  These bulbs can cost $50, but will last for twenty years. 
     

  • - Home voice-activated assistants are becoming more popular, as well as less expensive. Apple’s Siri, Google Home, and Amazon’s Echo all have different features, but perform the same way by with voice activation. Get advice from friends and the internet before you decide which assistant is right for you and your family. 
     

  • - Water leak and mold sensors are a very important gadget to add to your smart system.  They sense water leaks, and humidity and temperature changes in your home and can save you a bundle on water or mold damage repair. 
     

  • - No more checking smoke alarm batteries every six months--smart smoke alarms are hardwired, have built in carbon monoxide detectors, and can be controlled from your mobile phone.  Some detectors even have sensibility settings, so they know the difference in a lot of smoke and your bacon getting a bit too done. 
     

  • - Turn practically anything into a smart object with a smart plug. Once it’s plugged in to the object and connected to WIFI, you can control that object with your phone, or a home assistant.  
     

If you have technical or more specific questions about smart products, see this article from the National Association of REALTORS’® Center for REALTOR® Technology group.  It is a wealth of smart home information, as well as data issues, and ownership of devices in case of a home sale.   


Courtesy of New Castle County DE Realtors Tucker Robbins and Carol Arnott Robbins.   


Photo credit: thenextweb

Simple Kitchen Fixes

by Tucker Robbins


Whether you are planning on selling your home or just want to 
spruce it up a bit, the kitchen is the main attraction and heart of your home.  You don’t have to do an expensive remodel to improve the space! Here are a few tips to get your kitchen looking great and up-to-date. 


  • - Cabinets are on prominent display in your kitchen, and should look great.  Clean them up and give them a coat of primer and paint.  White, as well as neutrals like grey or taupe, gives a clean look and brightens up the space, and all work well with pops of color around the kitchen. Darker colors work best in large kitchens, and bright colors can be the star against neutral wall colors and decor. Click here for more cabinet painting tips from HGTV. 

  • - Refurbish with new cabinet doors.  This can be a little more expensive, but not as costly as replacing all of the cabinetry. You can even ditch the doors and use open shelving for a modern, clean feel. 

  • - Change out the hardware on drawers and cabinets.  Have an idea of what you want before you go to a home store to purchase the pieces, because there are so many choices available.  Classic styles are best if you plan on putting your home on the market. 

  • - Not only would it protect walls from liquids and grease, but adding a tile backsplash gives a whole new look to your kitchen. Thanks to advances made in peel-and-stick technology, double adhesive mats are strong enough for tile, and you can do this yourself with very little tile installation knowledge. This video from Ask This Old House shows step-by-step how to use this improved material and save time and money while updating your kitchen. 

  • - Give your sink a makeover simply by replacing the faucet and the handles. 

  • - Countertops dated and unattractive? Replacing them doesn’t have to be a big expense; some laminates look like the real thing and cost much less.  Styles include look-alike marble and faux granite.   

  • - Add a dash of style to cabinets with glass doors by papering the inside of the cabinet. Con-Tact© paper or any self-adhesive shelf liner is perfect for this small project.  Amazon carries many designs to choose from.  

  • - Installing a new light fixture can make a big difference in your kitchen, and doesn’t have to break the bank.  Look in thrift stores, consignment shops, or yard sales, and give an old fixture a facelift with some spray paint! If you’re unsure about installation, call an electrician or handy person to change the old to the new. 


If you decide to make just one change, or several, make a budget, stick to it, and stretch the makeover out over a few months so you don’t overspend.  For potential buyers to come in and see a clean, new-looking kitchen, or simply having your family and friends spend more time in the refurbished space, a simple update can make a big impact. 


Courtesy of New Castle County DE Realtors Tucker Robbins and Carol Arnott Robbins.   


Photo credit: howtonesstforless

Renovations and Your Homeowners Insurance

by Tucker Robbins


Making the decision to renovate any room in your home comes after a lot of thought and planning, but don’t forget that changes in your home can create changes in your homeowner’s
 insurance.  Whether the renovations lower or increase the payment depends on the job, so we’re going to look at how a remodel can affect your wallet: 


  • Additions:  Whenever you add square footage to your home, your policy will need to be upgraded, likely increasing your premium. 
     

  • Converted Space:  Turning your garage into a home theater or creating a master suite from your attic space may not require changes to the policy if the square footage is already covered, but as replacement value has changed, you will want to increase your coverage. 
     

  • Home System Upgrades: Improving electrical and plumbing systems can lower your premiums, as upgrading them can make your home safer from incidents relating to fire and leaky pipes. 
     

  • Pools:  Installing a pool or hot tub in your backyard will add to the replacement value of your home, and you’ll need to increase liability coverage to protect yourself in case of any accidents.
     

  • Roofing:  A new roof can lower your premium, especially if you upgrade it to the latest standards of protecting your home from natural disasters. 
     

  • Security Systems:  According to Safewise, adding a home security system could lower your homeowners premium by 20%.   
     

  • Solar Panels:  You will want to talk to your insurance agent before installing solar panels to your home.  They may require a separate policy, depending on how they are mounted, which would add to your budget.  
     

  • Upgrades:  Whether you use top-quality building materials for your renovation, upgrade the finishes in your home, or install state-of-the-art appliances in the kitchen, you’ll need to change your policy to reflect the replacement value. 


Making changes to your home improve your quality of life in many ways, but it may come at a cost.  Protecting your investment is worth it in the end, but you want to be prepared for anything that will add to your monthly budget. Schedule a meeting with your insurance agent before beginning any major changes in your home so you won’t be surprised when your payment increases. 


Courtesy of New Castle County DE Realtors Tucker Robbins and Carol Arnott Robbins.   

Photo credit: otipinsurance.com

Home Projects By Seasons

by Tucker Robbins


Thinking about doing some home improvements?  Whether it’s a kitchen or bathroom remodel, a whole-house painting, or floor refinishing, there’s a time of year when these jobs are easier to get completed, mainly because of how the weather affects not only c
onstruction, but the quality of the finished product as well.  Find the project you’re considering, and see when it’ll be the right time to get to work:  


Additions, because of needing a new foundation, could be started in late Winter/early Spring when the ground is still cold and more compact.  It makes for better digging and concrete pouring and setup. 
 

Exterior door replacement would be convenient any time except Winter, just in case there are any issues and the doors aren’t a quick switch. 
 

Exterior painting, for many reasons, is a better idea in early to late Summer, when temperatures are above fifty degrees. 
 

HVAC work, in non-emergency situations, should be done in the off seasons--new heater in warm months, air conditioning before it’s sweltering outside. 
 

Interior remodeling like kitchen and bathroom redo’s, can be done practically any time.  The main thing to keep in mind here is warm months are busier for contractors, and that can mean a job done in a hurry, or higher prices. 
 

Outdoor projects, even though a popular time for construction is the warmer months, should be started in late Winter, simply because you want to be able to spend your Summer enjoying your new outdoor space! 
 

Refinishing hardwoods is probably best completed during the times of year when humidity is low for the best finish, and so windows can be opened to allow air circulation to help get rid of any associated odors. 
 

Roofing, believe it or not, may get better results in hot months of the year, as the most common materials used will need warm temps for the best performance. 
 

Window repair/replacement is managed well during warm months or when frequent rain isn’t a factor. 
 

Keep in mind that Spring and Summer are busiest time for contractors.  If you are hiring your job out, the process should be started long enough in advance that you don’t have to be put on a wait list.  On that same note, during slower months, a contractor may give you a deal on the work, because there aren’t other jobs to be done, and you get their full attention!  Planning is key for a smooth finish on any project, any time of year. 


Courtesy of New Castle County DE Realtors Tucker Robbins and Carol Arnott Robbins.   

Photo credit: readers digest

Removing Carpet

by Tucker Robbins

Homeowners of houses built in the wall-to-wall carpet phase may be pleasantly surprised to learn that there is hardwood flooring beneath rug.  If you’ve pulled up a corner of the carpeting and found just that, or simply want to remove the old carpet before new is installed, DIY’ing this job is a good idea, but be ready--here are a few tips for removing wall-to-wall carpeting: 


  • - You’ll need a few things--heavy duty trash bags, protective gloves, sharp utility knife, dust mask, and a crowbar, and for removing padding glue or staples, a flat floor scraper or padding adhesive remover. 

  • - Remove all the furniture from the room, as well as floor vents, and any under shoe molding.  Vacuum very well to remove as much dirt and dust as possible. 

  • - If there is a room door that swings inward, take the door off the hinges to keep it out of the way. 

  • - Suit up with the dust mask and the work gloves, and start in a corner, pulling a section back with the crowbar, taking care to be mindful of the tack strips that can be holding down the carpet around the perimeter of the room. 

  • - Once you’ve pulled the carpet back, fold it over, and, using the utility knife, cut a section of carpet from the back side for easier going. (Cutting the large rug into sections makes it much more manageable than rolling up the whole piece.)  

  • - Remove the tack strips with the crowbar if you have hardwood floors under the padding that you plan on refinishing.  Start in the middle of the strip, loosening the nails, and work towards the ends. 

  • - After the tack strips are out, tackle the padding.  Pull it up, cutting into sections the same way the carpet was cut. 

  • - Some padding is installed with adhesive, and some is stapled to the floor.  If there is glue remaining on the floor, follow the instructions on the carpet padding adhesive remover to get the glue off the flooring. The staples can be removed with the floor scraper. 

  • - Remember that if you’re planning on recarpeting the floor, leave the tack strips in place, and remove the padding anyway, as most installers require new padding to be put down.


Call your local municipality to find out how they would like for you to dispose of the old carpet, because the large amount may not be able to be picked up by the regular truck.  Don’t hesitate to ask about recycling programs that are available, as virtually all carpeting can be recycled.  

Courtesy of New Castle County DE Realtors Tucker Robbins and Carol Arnott Robbins.   

Photo credit: realitydaydream.com

Home Improvements for Seniors in New Castle County, DE

by Tucker Robbins

Whether you are simply making your elderly father’s home a little safer, or if you plan on moving your parents in because then don’t need to be living along anymore, a few changes in the house need to take place.  While every family is unique, most needs of our aging parents are the same.  Let’s see how we can make some small improvements that have big impact on their safety and comfort. 


  • - Since it isn’t always possible to add a full “in-law” suite to your home, you may decide to give Mom and Dad the master suite, so they can have their own private bathroom. 

  • - Change out the door knobs to lever-type handles for easier opening for those with arthritis or other small motor skill issues. 

  • - Install grab-bars to the shower, bath and toilet walls, for those who need assistance in moving around in the bathroom.  This will offer some independence for the elderly person who hates to ask for assistance. 

  • - For the wheelchair-bound parent, or one who needs to use a walker, consider adding an accessibility ramp to your most-used entry.  Costs vary on this job, but a contractor that specializes in the construction of a ramp will take care of this job swiftly and efficiently. 

  • - Widening doorways is something you may need to do if you anticipate wheelchair use in your parent’s future.  Enlarging them to 36” is the general width for ease of use. 

  • - The type of flooring in the home can impact whether it’s a fall risk for someone who has trouble getting around.  Consider installing low-pile carpeting, but in areas of hard flooring, where carpet isn’t necessarily an option, secure low-pile area rugs with double-sided carpet tape, or no-slip rug padding. 

  • - Remodeling the bathroom may be an option, and a walk-in or wheelchair-accessible shower with a “curbless” entry is a safe choice.  A built-in shower seat and adjustable showerhead are added benefits. 

  • - Changing faucets in the kitchen and bath with a single-lever handle for ease of use, or even a faucet with a motion sensor or touch off-and-on upgrade. 

  • - Electrical issues to consider:  light switches that can be pressed for turning off and on, electrical outlets placed higher than the standard height, and adding more lighting. 

  • - Privacy may be an issue for a still-independent older person, especially if there are children in the home.  Providing a sound-proof door will cut down on noise when Mom wants to sleep in, or if Dad would like to watch the game without interruption. 


Having your parents or grandparents move in is life-changing for everyone in the family home.  AARP offers a guide to multi-generational living, with questions to ask yourself as well as your aging parents before you finalize your decision.  Don’t look at this stage of life as a challenge, but rather a way to be a watchful eye over your parents while they maintain their sense of independence and quality of life. 


Courtesy of New Castle County DE Realtors Tucker Robbins and Carol Arnott Robbins.   

Displaying blog entries 1-10 of 12

Syndication

Categories

Archives

Quick Search

Contact Information

Photo of Tucker Robbins Real Estate
Tucker Robbins
Berkshire Hathaway HomeServices
3838 Kennett Pike
Wilmington DE 19807
(302) 777-7744 (direct)