Skip down to page content.

Real Estate Information Archive

Blog

Displaying blog entries 151-160 of 227

About Reverse Mortgages

by Tucker Robbins


Retirement is a time in our lives that we should be looking forward to having time to do what we’ve been wanting to do:  spending time with family and friends, traveling, learning new things, or just enjoying days without a set routine.  Some retirees have
 found that, even though their home is paid for, the financial end of retirement may not be going to smoothly.  Ads for Home Equity Conversion Reverse Mortgage (HECM), or reverse mortgages, fill magazines and daytime television, but there are things you need to know before you’re tempted to go this route to help you meet a financial need.  


  • - If you’re considering applying for a reverse mortgage, talk to a financial counselor to see if there’s another route that you can take.  Don’t wait until you’re feeling desperate and signing a contract for something you’re not sure about. 

  • - HECM’s are government insured if you go through an FHA-approved lender.  Find more information from the Housing and Urban Development website. 

  • - Doing research on the internet it great but be wary of every website that is sponsored by a financial-looking institution.  It’s best to call a person in the financial business that you trust to give you correct and accurate information. 

  • - Two things you should consider before you take out a reverse mortgage are whether you plan to live in your home for a long time, or if your spouse or someone else is still living with you in the home.  Investopedia has more information about reverse mortgage requirements that may make it a poor option for you, and why. 

  • - If you are planning on leaving the house to your heirs when you pass away, and you opt for a reverse mortgage, the heirs will be responsible for the paying back of the loan in full or 95% of the balance within six months. 

  • - Property taxes can be a real burden on a retired homeowner and is a reason one would consider a reverse mortgage.  Call your local municipality and find out about any programs that will assist you with paying your taxes without fear of tax liens and foreclosure. 

  • - Consider your health as well.  When you acquire a reverse mortgage, but at some point, become unable to care for yourself and must move in with family or into assisted living for twelve months or more, the loan will have to be repaid. 


The Federal Trade Commission has plenty of information and links to non-biased websites for more information, to help you find a government-approved housing counseling agent, and information from AARP.  Making the decision to get a reverse mortgage isn’t one to make without a great deal of considering other options to help you through a tough time.  


Courtesy of New Castle County DE Realtors Tucker Robbins and Carol Arnott Robbins.   

Photo credit: EInsurance

What Shouldn't Be In Your Garage

by Tucker Robbins


Our garages aren’t serving their original purpose these days--very few Americans use their cars specifically for parking their cars.  We use them for storage, however, and while it makes sense to stash things in there, out of the way and seen only when we 
have to go in the garage, it’s still more convenient to get there than it is the attic.  But as sensible as it may seem, there are some items that shouldn’t be kept in the garage. 


  • - Wooden furniture should be kept somewhere that’s protected from temperature changes and humidity.  Unless your garage is climate-controlled, keep it in a spare room inside the house, or give it away. 

  • - Propane tanks should be stored outside, on a flat surface, away from anything that can spark.  If you have tanks inside your garage, and the valve begins to leak, it can be deathly.    

  • - Work cloths that have oily residue on them should be treated with great care, as they can spontaneously combust. The Family Handyman suggests that oily rags should be air-dried and stored inside a metal container. 

  • - Firewood is an attractant for pests, and as convenient as it may be to keep it close by in the garage, it’s best to keep most of it at least twenty feet from the house.  Bring in only what you’ll need for a day. 

  • - Paint is highly flammable, and can be rendered useless in a garage, where temperatures can be extreme.  Check for manufacturer's recommended temperatures on the can, and store accordingly. 

  • - Canned food should be stored at room temperature, so if you find your pantry overflowing, donate extra to a food pantry.  Keeping it in fluctuating temperatures can cause spoilage, or freezing and thawing could affect the quality of the food. 

  • - If you have a second refrigerator in your garage, it’s wonderful for extra food storage.  However, a fridge that isn’t manufactured to stand extreme temperatures can fail, leaving you with a mess and ruined food.  Garage kits for refrigerators can be found at hardware stores and online, and will make your extra storage more efficient. 


Cleaning out the garage can be a monumental task, but if you have any of these items stored there, you need to get them out and stored properly.  Keeping your home and family safe should be the highest priority, and no amount of hard work is worth the risk of losing either.

Courtesy of New Castle County DE Realtors Tucker Robbins and Carol Arnott Robbins.   

Photo credit: napomichigan.com

Childproofing for Guests

by Tucker Robbins


It’s the visiting time of year, and some of your guests will likely be bringing little ones with them.  If your home is now child-free, you may not be aware of possible hazards for little ones.  Get your home ready for them with these tips:


  • - In the case that you don’t have cabinet locks and cleaning supplies are easily accessed, go ahead and place them all in a small cleaning bucket or basket so you can just grab them and put them out of reach when or before guests arrive. 

  • - The kitchen is usually the hub when company comes, so keep little ones from under foot by putting some interactive magnets on the fridge door--there are some pretty nifty learning-type magnets available, as well as the traditional alphabet letters. 

  • - If you have candles burning, make sure they are far from the reach of any age child, and in a prominent place so that they’re always in sight of you or another adult. 

  • - Check blinds and drapes for long cords--either drape them over the tops of the blinds or purchase cord holders to keep them up and out of reach. 

  • - For homes with stairs, purchase or borrow a latching safety gate to prevent little ones from wandering up the steps. 

  • - Ask everyone to keep the toilet lid down, or close the bathroom door when they go in and out.  If you ask them, they’ll be more conscious of it, and oblige. 

  • - In case you have a cozy fire burning, at least have a screen set up in front of the fireplace door as a barrier in case a little one stumbles while they’re walking nearby. 

  • - Houseplants can be tempting to a little explorer, but some plants can make us sick if ingested.  Do a bit of research, and if yours are in that category, give them a temporary home out of the way. 

  • - Keep an eye on yard sales or thrift stores for age-appropriate toys and games in good condition.  Clean them up, and place them in a basket or on a game table in the living area; kids love “new” toys. 

  • - Have someone get down on all fours on the floor and look for hazardous things that could be interesting to a child, and make the temporary changes you need to so your littlest guests will be safe. 


Enjoying the holidays means enjoying your guests, and not worrying if the youngest ones are getting into something you don’t want them to, or something potentially dangerous.  Your visitors will appreciate the extra effort it took to keep their children safe and entertained, making their visit more memorable.


Courtesy of New Castle County DE Realtors Tucker Robbins and Carol Arnott Robbins.   

Photo credit: Realtor.com

Removing Carpet

by Tucker Robbins

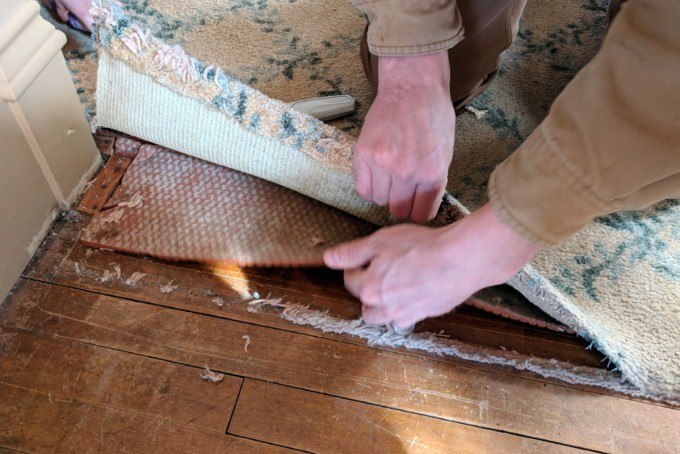
Homeowners of houses built in the wall-to-wall carpet phase may be pleasantly surprised to learn that there is hardwood flooring beneath rug.  If you’ve pulled up a corner of the carpeting and found just that, or simply want to remove the old carpet before new is installed, DIY’ing this job is a good idea, but be ready--here are a few tips for removing wall-to-wall carpeting: 


  • - You’ll need a few things--heavy duty trash bags, protective gloves, sharp utility knife, dust mask, and a crowbar, and for removing padding glue or staples, a flat floor scraper or padding adhesive remover. 

  • - Remove all the furniture from the room, as well as floor vents, and any under shoe molding.  Vacuum very well to remove as much dirt and dust as possible. 

  • - If there is a room door that swings inward, take the door off the hinges to keep it out of the way. 

  • - Suit up with the dust mask and the work gloves, and start in a corner, pulling a section back with the crowbar, taking care to be mindful of the tack strips that can be holding down the carpet around the perimeter of the room. 

  • - Once you’ve pulled the carpet back, fold it over, and, using the utility knife, cut a section of carpet from the back side for easier going. (Cutting the large rug into sections makes it much more manageable than rolling up the whole piece.)  

  • - Remove the tack strips with the crowbar if you have hardwood floors under the padding that you plan on refinishing.  Start in the middle of the strip, loosening the nails, and work towards the ends. 

  • - After the tack strips are out, tackle the padding.  Pull it up, cutting into sections the same way the carpet was cut. 

  • - Some padding is installed with adhesive, and some is stapled to the floor.  If there is glue remaining on the floor, follow the instructions on the carpet padding adhesive remover to get the glue off the flooring. The staples can be removed with the floor scraper. 

  • - Remember that if you’re planning on recarpeting the floor, leave the tack strips in place, and remove the padding anyway, as most installers require new padding to be put down.


Call your local municipality to find out how they would like for you to dispose of the old carpet, because the large amount may not be able to be picked up by the regular truck.  Don’t hesitate to ask about recycling programs that are available, as virtually all carpeting can be recycled.  

Courtesy of New Castle County DE Realtors Tucker Robbins and Carol Arnott Robbins.   

Photo credit: realitydaydream.com

Real Estate Disclosures and You

by Tucker Robbins

Zillow.com defines the term disclosure as “...the buyer’s opportunity to learn as much as they can about the property and the seller’s experience in it.”  In most states, this simply means that the seller must let the buyer know about problems that they are aware of.  Whether you’re selling or buying a house, disclosing issues with the house is an extremely important part of the process.  


What Disclosure Means for the Seller 

  • - Your listing agent will provide a form for you to fill out, answering questions with either yes, no or I don’t know about different aspects of the house.  This form should be filled out truthfully and to the best of your knowledge. 

  • - Items that most states ask you to disclose to the buyer:  lead paint or asbestos, previous repairs or additions, mold or water damage, pest issues, drainage problems, foundation cracks, problems with HVAC and other appliances, and if the roof is leaky. 

  • - If you think there might be a problem, say possible mold in the crawlspace, have an inspector come and have a look.  It’s better to be safe than sorry here. 

  • - While you’re going over the disclosure form, if you’re not sure if you should report something, report it anyway.  It’s best to err on the side of caution. 

  • - Have the disclosure ready before you’ve accepted an offer for your own protection. 

  • - Your listing agent will be aware of all government disclosure requirements--federal, state, and local--so be prepared to report all that these laws ask of you. 


Disclosure and the Buyer 

  • - Once you receive the disclosure statement, go over it carefully and ask questions if you’re not sure about anything listed, because you must sign the disclosure. 

  • - The extra expense of having an official inspection done on the house is vital to this part of the sale.  Have the disclosure form information with you when you meet the inspector at the house, so you can go over the problem places with a pro. 

  • - In the case of any additions to the home, check the local government building permit and zoning information to make sure the addition was done the legal way by licensed people. 

  • - If you have any issues with the seller’s answers on the disclosure statement, and don’t want to make the repairs, and can’t come to an agreement with the seller, it may be best to walk away and look for another house. 

  • - Once you are satisfied with the disclosure and have the peace of mind that the sale should go through, sign off on the disclosure. 


A disclosure should be a seller’s protection plan, and smart sellers will be completely honest, and maybe even over-disclose.  Also, be aware that some states even ask sellers to disclose things like traffic noise, and even paranormal activity!  Your Realtor will know everything you need to provide to buyers, so the sale of your home goes smoothly.

Courtesy of New Castle County DE Realtors Tucker Robbins and Carol Arnott Robbins.   

Photo credit: davesellsmetrodenver.com

Brighten the Dark

by Tucker Robbins

Daylight is becoming noticeably shorter this time of year, and since Daylight Savings Time ended, most people will be coming home from work in the dark.  Options for lighting have come so far, you can customize your lighting inside and outside for safety, convenience and aesthetics.   


  • - Motion-sensor lighting has come a long way, and many have bright, long-lasting LED’s, timers, and motion sensitivity settings.  Battery-operated lights are the easiest to install and can be placed virtually anywhere.  Use them where you park when you come home, near walkways, as well as the entryway.  Stylish motion sensor lamp posts are perfect for integrating into the landscaping, as they look great besides offering some security. 

  • - For your garage entry, install wall sconces on either side of the door, or one light over the door, shining downwards.  Motion sensors or smart lighting that come on when you drive up are best. 

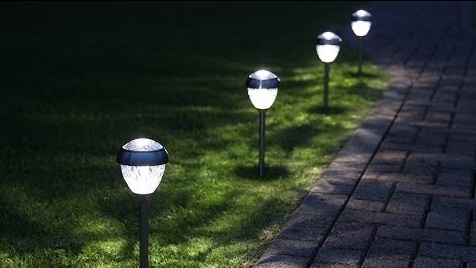
  • - Solar stake lights are perfect for your landscaping or walkway, but instead of a straight line of lights, place them in various places among plantings to add some interest.  When it’s dark, the low wattage of the solar lights will provide enough light for you to see well. 

  • - Install step or stair lights for the amazing look, as well as safety.  Add them along the sides to the railing, or on the risers.   

  • - If your entryway is covered with a porch, place a lamppost near the steps or install lighting on the porch posts closest to the steps, or consider adding an overhead fixture to the porch ceiling to light up the entire area. 

  • - Depending on the placement of your light fixtures, make certain the types you choose are going to be able to take the elements.  A light with a UL damp rating is best under a covered area, and one with the UL wet rating can handle harsh weather conditions like direct sunlight, rain and even saltwater spray. 

  • - As noted above, some lighting needs to be motion-sensored, but others can be managed by timers, while solar lighting usually has sensors to come on when it’s dark and turn off at daylight.   

  • - The type of bulb you use is a personal choice, but keep in mind that if you’re going to be using the lights all night, LED’s use far less energy, and last much longer than other types, saving you money and time.  Don’t let the memory of the harsh glare LED’s gave off when they were first produced; their technology has come a long way and the industry has taken great strides to give consumers softer, more pleasing light. 


Before adding bright security lighting that can affect the homes next door, talk with your neighbors, as they’ll appreciate you consulting with them.  You need to make certain you won’t be disturbing their rest or have your lights shining into their windows.  Not only do you want to have lighting outside for security, but for the ambience as well.  A nicely-lit home looks inviting and adds to the style of your home. 

Courtesy of New Castle County DE Realtors Tucker Robbins and Carol Arnott Robbins.   

Photo credit: Youtube

Get These Fall Jobs Done

by Tucker Robbins

The weather is cooler, but the days are still long enough to get some regular Fall maintenance done.  Get your home prepped for cooler weather now so it won’t be a problem later.   
 

  • - Clean gutters before the leaves fall so they won’t get clogged.  Consider installing some gutter protectors so the coming leaf drop won’t cause further problems. 

  • - Raking leaves is a job many don’t care for, but if you do, and plan on burning them, check with your local government offices or HOA guidelines to make certain it’s allowed.  If not, it’s best to bag them for curbside pick-up, or find a gardening neighbor that would appreciate the extra composting material. 

  • - After you’ve mowed and raked one last time, fertilize the lawn.  The roots are still active, and the extra nutrients will help the grass overwinter safely. 

  • - Speaking of using the lawnmower one last time, drain the fuel and oil from gas-powered equipment, and clean them well.  This Old House offers some excellent tips on putting up the lawn mower for Winter. 

  • - Give the roof a good look and replace broken or missing shingles. 

  • - Check windows and doors--inside and out--for drafts and apply weather-stripping or caulking where it’s needed.  Today’s Homeowner has a video that shows us how to apply caulk around our windows. 

  • - Call your HVAC serviceperson, and have the heater checked and serviced, if necessary.  Go ahead and make sure your filters are new--buying them in bulk keeps you from having to remember to get one every couple of months and saves you money. 

  • - If you use wood for heating, hopefully it’s already cut and seasoned.  Store it at least 30 feet from the house, covered, unless you bring it in a few days before you burn it. 

  • - Turn off your sprinkler system timer, shut water off at the main, and drain the system. If you’re not able to drain it yourself, it may be worth the money to hire a pro to blow the pipes out and drain the sprinkler heads. 


It may take a couple of weekends to get all of these done, but all are important to do, and hopefully save you from a headache and spending a lot of money later in the Winter.  Some of these chores could be done by a teenager looking to earn a few extra dollars, and they can learn something in the process. You’re never too young to learn about taking care of your home.


Courtesy of New Castle County DE Realtors Tucker Robbins and Carol Arnott Robbins.   


Photo credit: perrycarroll.com

Getting Ready for Houseguest Season

by Tucker Robbins

It may be just the beginning of Autumn, but many are already thinking ahead to the holidays and having guests over.  If it’s been a while since you’ve been in the guest room except to create a pile of things that should be stored somewhere else, it’s time to get in there and make it ready for anyone who may be coming to visit.  
 

The Guest Room 

  • - Tackle the cleaning of the guest room first.  Anything that you’ve stashed on the bed, closet or dresser that should be stored elsewhere, get that done.  Use under-bed storage containers to get some things out of the way, or store on the closet shelf. 

  • -Go through the closet and remove things that haven’t been worn in a year or more and donate those.  Guests will appreciate some empty hangers in the closet to keep their clothes from staying folded in a suitcase. 

  • - On the same token, open the top two dresser drawers, and purge anything inside that isn’t being used, and empty at least one drawer.  Use a sachet of cedar chips for a nice fresh-smelling place for your guests to keep their belongings. 

  • - Clean the room as if you were Spring-cleaning:  wash all the bedding, vacuum the whole room, including under the bed, and dust all wood surfaces well.   

  • - Have extra pillows and blanket on the bed, especially if the room is on the cooler side of the house.  Once you have the big things done, getting the room ready just before they arrive will go more quickly. 


No Guest Room? 

  • - If you don’t have the extra bedroom, consider investing in a futon, sofa bed or even a twin chairbed for your living area.  Even a good quality air mattress can be made into a comfortable overnight sleeping spot, and can be put wherever you want, and is easier to use for some privacy for your guests. 

  • - Your couch is a bit “lumpy,” or you simply want to make it comfier in case of needing it for extra beds, and a feather bed is perfect for this.  Featherbeds are easily stored, and will certainly offer some comfort when placed on top of the sofa cushions. 

  • - You will need a small table or other flat surface for guests to keep their luggage--anything that will make them feel like they have space of their own.   

  • - If your guest space will be in a living area, give them a feeling of privacy with a screen to block off the sleeping area.  Deciding to use a screen can give you an excuse to make one, and apartmenttherapy.com has a great tutorial for a screen made from hollow-core doors. 


Extras 

  • - Start stocking up now on trial- and travel-size toiletries, and purchase a couple of new towels to keep tucked away for guests. 

  • - Make sure the lighting in the bedroom is good, and all the lightbulbs are working. 

  • - Have a new house key made and hang it on a special keyring and use solely for guests. 


Getting the big things done now won’t have you scrambling during the busy holiday season to get ready for any overnight visits.  Most of the time, the whole point of having friends and family spend a few days in your home is to enjoy them!  Preparing now will mean less stress and plenty of enjoyment later!

Courtesy of New Castle County DE Realtors Tucker Robbins and Carol Arnott Robbins.   

Photo credit: hofmeisterrealty.com

New Castle County DE Real Estate Market Watch For September 2018

by Tucker Robbins

New Castle, De Sales Activity


Q2 2016Q3 2016Q4 2016Q1 2017Q2 2017Q3 2017Q4 2017Q1 2018Quarter50100150200

New Castle, De Home Sales Price Trends


Q2 2016Q3 2016Q4 2016Q1 2017Q2 2017Q3 2017Q4 2017Q1 2018Quarter120K140K160K180K200K
 Median      Average
Period Total Sold Average Price Median Price
2018      
JAN-MAR 83 $154,348 $120,000
Total 83 $154,348 $120,000
2017      
OCT-DEC 142 $182,089 $140,650
JUL-SEP 173 $181,614 $150,000
APR-JUN 142 $163,863 $139,950
JAN-MAR 135 $140,735 $124,900
Total 592 $168,148 $139,900
2016      
OCT-DEC 126 $193,530 $158,950
JUL-SEP 187 $188,611 $162,500
APR-JUN 180 $161,890 $137,500

Courtesy of New Castle County DE Realtors Tucker Robbins and Carol Arnott Robbins.   

Small Kitchen Tips!

by Tucker Robbins

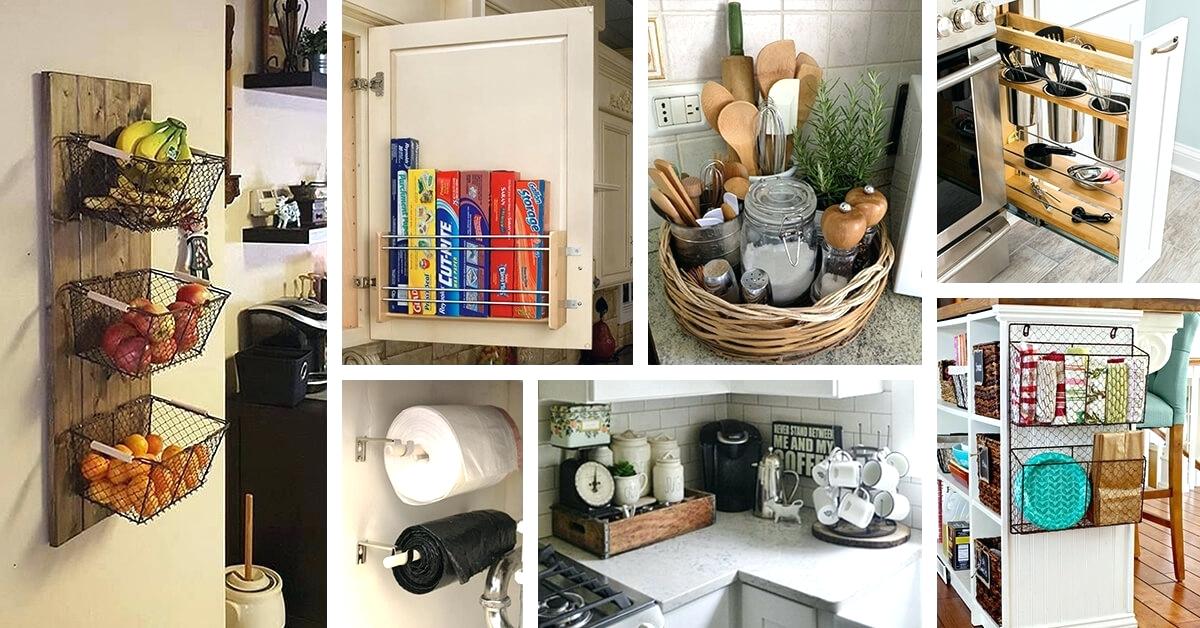
There are many other clever ways to maximize the space in a small kitchen.  Whether you’re downsizing or moving to a tiny home, or are getting used to a smaller condo kitchen, it’s important to use the space you have, and take into consideration what you’ll use the most, and keep it close.  Check out these tips for ways to make the most out of your small kitchen: 
 

  • - Wherever you have available wall space, add shelving or purchase easy-install shelves or holders from your local home center. 

  • - A stylish towel rack can be installed virtually anywhere to hang pots and pans with S-hooks and keep them out of the cabinets. 

  • - If drawer space is at a minimum, keep the long-handled cooking utensils nearby in an unused cookie jar on the counter, or hang a basket on the wall or cabinet side to hold these important items. 

  • - Use racks that can be mounted to the insides of cabinet doors to store spices and other smaller items that take up precious cabinet space.   

  • Domestically Speaking has a great how-to for adding tip-out storage onto false drawer fronts for smaller items like sponges and scrub pads. 

  • - If pegboard storage is good enough for Julia Child, it’s good enough for our kitchens!  It can be cut to fit any wall space, then painted to match any decor, making it even more stylish for your pots and pans. 

  • - Magnetic strips can store lots of things:  cutting knives and metal cooking utensils on your backsplash, or spice jars (with metal lids) under cabinetry.  Mount smaller strips with sticky backs to baby food jars, and store spices in them on the side of your fridge. 

  • - The open space over cabinetry is the perfect place to use baskets to store lesser-used items.  Anything to save precious cabinet space. 

  • - Very small kitchens leave little space for a table or an island, so mounting a folding table or shelf to the wall can help you during prep or mealtimes, and fold out of the way when you don’t need it. 

  • - Stove covers aren’t just for RV’s.  They’re great for providing extra space for prep and storage, and come in many styles and sizes. 

  • - Use a tiered cooking rack inside cabinets for storing virtually anything--plates, coffee cups, or your smaller baking pans.   


According to the building industry, the average size kitchen is 70 square feet, and many homes have an even smaller space. Taking the extra steps to make the space work best for you will make a big difference in meal prep, and meal times, not to mention satisfaction with your home. 

Courtesy of New Castle County DE Realtors Tucker Robbins and Carol Arnott Robbins.   

Photo credit: shapemasters.info

Displaying blog entries 151-160 of 227

Syndication

Categories

Archives

Quick Search

Contact Information

Photo of Tucker Robbins Real Estate
Tucker Robbins
Berkshire Hathaway HomeServices
3838 Kennett Pike
Wilmington DE 19807
(302) 777-7744 (direct)